Create a web personal profile page with Hugo blog + Netlify for free

Hugo is one of the most popular open-source static site generators. With its amazing speed and flexibility, Hugo makes building websites fun again.
Netlify is a tool to run sites globally and changes deploy automatically from your git repos.
To achieve the goal of this article, you will need to install hugo on your computer and register a netlify account for serving your site.
Part 1. Create a Hugo site
Installing hugo from windows or mac
## MacOS
brew install hugo## Windows
choco install hugo -confirm
for more details, you can visit https://gohugo.io/getting-started/installing/
Once hugo is installed, and you can run this command to check the version
hugo versionCreate a hugo site
Now let’s create a new site using hugo, I am calling it hugo-netlify-resume.
hugo new site hugo-netlify-resumeI also want to add a resume theme to this site.
# add a theme and copy it to the sample blog
git clone git@github.com:aerohub/hugo-orbit-theme.git
And copy all the theme files to our site’s themes folder. (we don’t want to include the git files)
rsync -r --exclude '.git' hugo-orbit-theme hugo-netlify-resume/themes/Most of the hugo themes, you can always find a exampleSite inside it, that has instructions and samples to tell you what you need for the site configuration. In this example, I just copy the sample one to our project root folder.
copy the themes/orbit/exampleSite/config.toml to the root folder or replace content with it.We can also add markdown posts inside the content folder. Let’s create a test.md (I am doing this to make sure content folder is actually deployed by netlify).
To run hugo locally, use
hugo server -wAnd visit http://localhost:1313/ from your browser.
Part 2. Push hugo site to GitHub
Cd into the site folder.
cd hugo-netlify-resumeInitialise a git repo, commit everything and set & push to remote repo.
git initgit add .git commit -m "create blog and add theme"# you can create a empty repo at github.
git remote add origin <your github repo>git push -u origin master
Now you should have all your site pushed to github repo’s master branch.
Part 3. Deploy to netlify
you can get one free site published in netlify with free plan.
Go to create a new site and select GitHub (for this case),

it will ask you to authorise netlify api for access your repository.

Then select the owner and branch (I selected master here, you may use your branching strategy for staging, production etc environments). Put “hugo” for build command and “public” for publish folder.
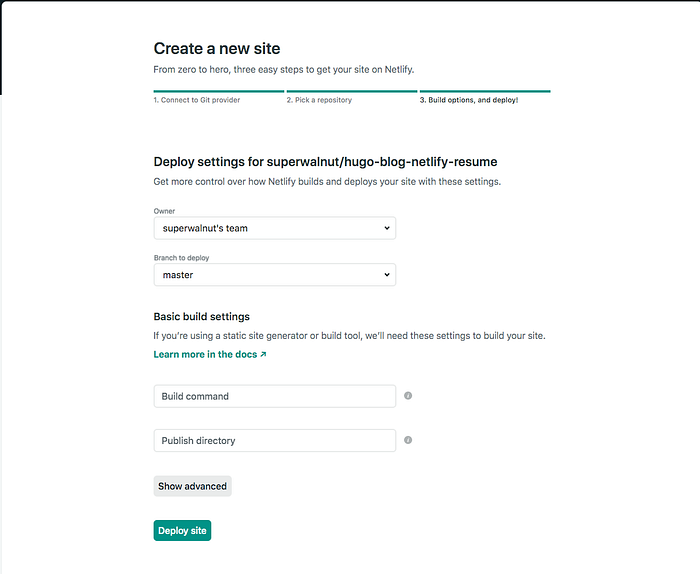
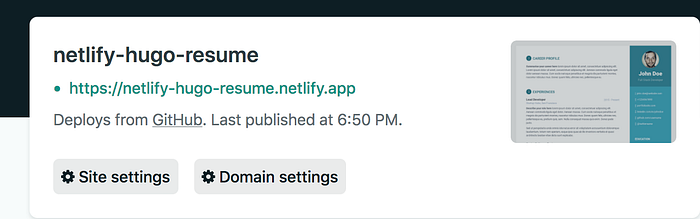
Once you clicked “Deploy site”, you should see a site url available to access.
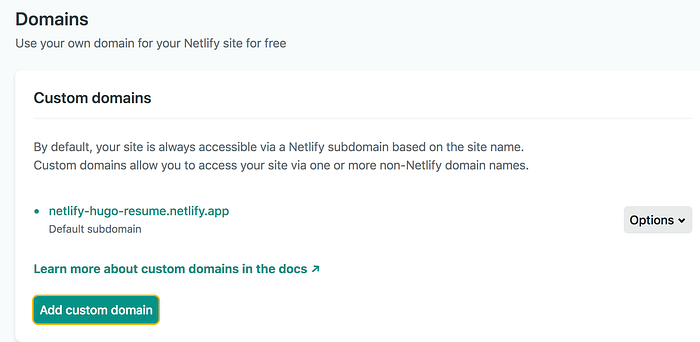
You can also bind custom domains to it and apply ssl certificate. Of course you will need to verify you own the domain and with a few clicks, you are all set.
Part 4. You can also deploy using netlify cli
Install netlify cli
npm install netlify-cli -gLogin to netlify, this will redirect you to login and Once authorised, netlify cli will store your access token in your home folder, under .netlify/config.json. netlify cli will use the token in this location automatically for all future commands.
netlify loginThen run netlify init to connect to your repository and create a site on netlify.
netlify init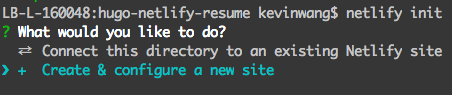
It will ask you to authorise with GitHub,

And once you have finished answering all the questions, your site is deployed and running.

Final bit, your site’s content is loading up on the browser, but all the static content is not reference correctly. You probably see it look like this.

Because hugo site requires a baseurl to be updated to the correct url. So go to the root folder of your site and modify config.toml
baseurl = "https://<Your netlify URL>.netlify.app/" Congratulations, you just get your online personal profile up and running with netlify!
If you find my article is helpful, please click Applaud to support me.

Here is the link to GitHub to grab the complete source code for the app.